
When to Use Job Scheduler
Job Scheduler is a great tool for automating recurring tasks that need to run periodically or at specific times. Here are some scenarios when you might want to use it:
- Automating Data Imports/Exports: Schedule tasks to import or export data at regular intervals, such as syncing with external systems.
- Generating Reports: Schedule tasks to generate reports daily, weekly, or monthly and send them to relevant stakeholders.
- Periodic Cleanup: Set up jobs to clean up temporary data or perform maintenance tasks on a recurring schedule.
- Sending Notifications: Schedule tasks that send notifications or alerts to users based on specific events or time-based conditions.
Using the Job Scheduler in Liferay
Setting up and managing tasks through the Liferay Job Scheduler is straightforward. Here are the key steps:
1. Adding a New Job Scheduler Task
To begin, you need to navigate to the Job Scheduler section in the Liferay Control Panel:
- Open the Global Menu and go to Control Panel.
- Navigate to Configuration → Job Scheduler.
- Click the Add button and select a template for your task.
The selected template will define the core logic of the job. You can customize the task by setting specific properties in the settings editor, which will be injected at runtime without requiring code changes or redeployment.
2. Scheduling the Job
Once you've created the Job Scheduler task, the next step is to schedule when it will run. To activate the trigger and define its schedule:
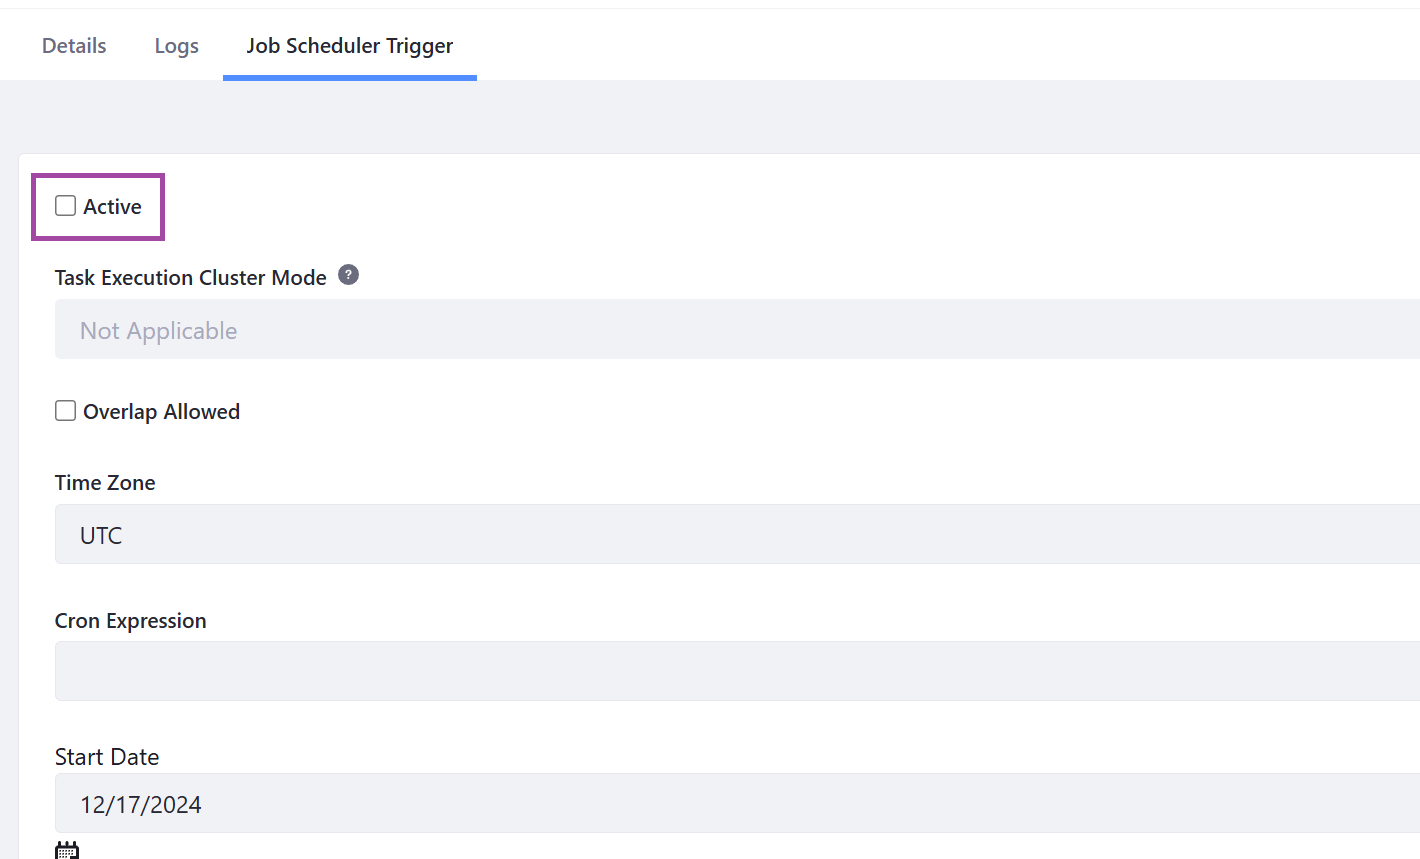
- Go to the Job Scheduler Triggers tab.
- Click the desired task and go to the Job Scheduler Trigger tab.
- Define the cron expression, start and end dates, time zone, and whether overlap is allowed.
- Activate the trigger by saving the settings.
Code Example
Create a taskExecuter class which extends BaseDispatchTaskExecutor class and define your task inside 'doExecute' method.
@Component(
    property = {
        "dispatch.task.executor.name=customtask", "dispatch.task.executor.type=customtask"
    },
    service = DispatchTaskExecutor.class
)
public class CustomTaskExecutor extends BaseDispatchTaskExecutor{

	@Override
	public String getName() {
		// TODO Auto-generated method stub
		return "customtask";
	}

	@Override
	public void doExecute(DispatchTrigger dispatchTrigger, DispatchTaskExecutorOutput dispatchTaskExecutorOutput)
			throws Exception {
		// TODO Auto-generated method stub
		System.out.println("Task is being Execute ...");
	}
}
Deploy above module in Liferay and follow the below steps:
Go to Control Panel - click on Job Scheduler.
Create a New Scheduler - click on Add New.
Select our task - in our case that would be 'customtask'.
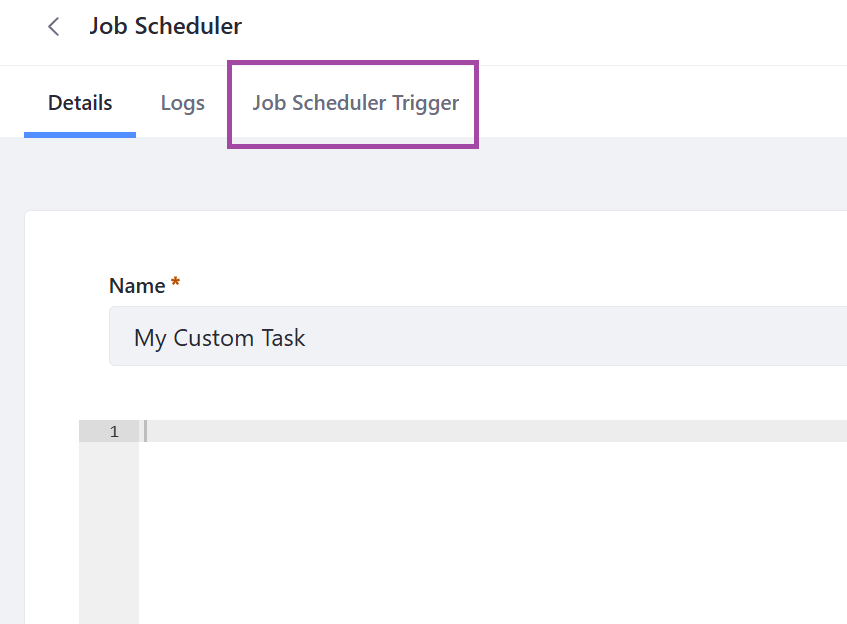
Give a name - here we give name 'My Custom Task' and click on save.
Open our task - as we save, reopen our task. Now you are able to see the tab for 'Job Scheduler Trigger'. Click on it.
Active the scheduler and Set The time - use cron expression for setting up time and you can also run the job manually.